
No Result
View All Result
Newsletter
Me Passions
  • Home
  • About US
    • Privacy and Copyright 2020
    • Disclaimer
  • Categories
    • Travel
    • Collectibles
    • Recipes
    • Meet and Greet
    • Music
    • Photoshop
    • Photography
    • Jewelry
    • Movie
  • Women
    • Women handbags
  • Men
    • Watches
    • T-shirts
  • Jewelry Sterling Silver
  • Learn Guitar Online
  • Acoustic Guitars
    • Aiersi Resonator Guitar
    • Resonator
    • Custom Electric Guitars
    • Guitar Amplifiers
    • Guitar Builder/Luthier Supply
  • Books
    • Food book
    • Movies & TV Shows
  • Music
    • Albums
    • Beatles vinyl
      • Beatles Memorabilia
    • Turntable Record Player
  • Shop
    • Basket
    • Checkout
  • Home
  • About US
    • Privacy and Copyright 2020
    • Disclaimer
  • Categories
    • Travel
    • Collectibles
    • Recipes
    • Meet and Greet
    • Music
    • Photoshop
    • Photography
    • Jewelry
    • Movie
  • Women
    • Women handbags
  • Men
    • Watches
    • T-shirts
  • Jewelry Sterling Silver
  • Learn Guitar Online
  • Acoustic Guitars
    • Aiersi Resonator Guitar
    • Resonator
    • Custom Electric Guitars
    • Guitar Amplifiers
    • Guitar Builder/Luthier Supply
  • Books
    • Food book
    • Movies & TV Shows
  • Music
    • Albums
    • Beatles vinyl
      • Beatles Memorabilia
    • Turntable Record Player
  • Shop
    • Basket
    • Checkout
No Result
View All Result
Me Passions

Make Your Own Woven Rag Rug

by golfinger007
10th May 2022
in Lifestyle
0
Share on FacebookShare on Twitter


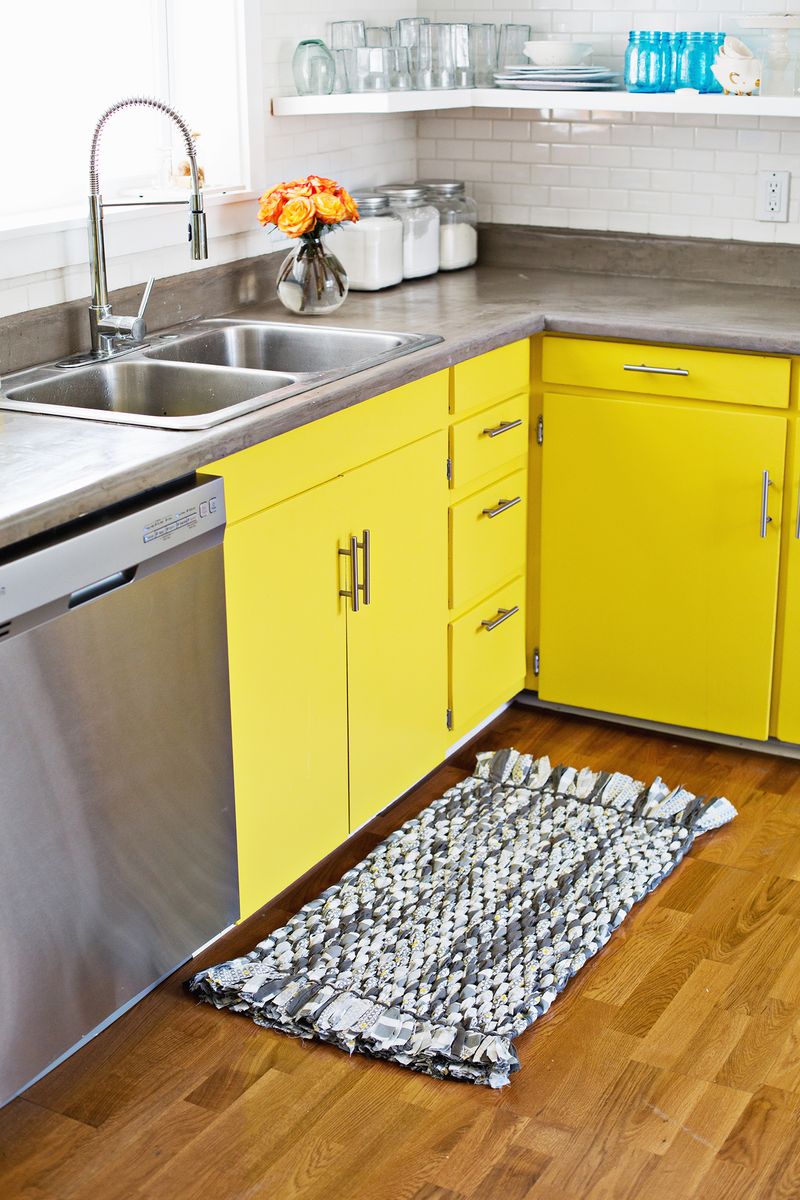
Anyone can make this woven rag rug, and it’s SO easy to customize it to be any size, shape, or color you need for your space.

I wanted to make a woven rag rug that was cute, woven, relatively easy for a first-time rug maker. After a bit of research, I found the perfect woven rug that fits all my needs!

If you have a few old bedsheets around, this is the perfect way to use them (and get an adorable rug out of the process).
Make Your Own Woven Rag Rug abeautifulmess.com

Make Your Own Woven Rag Rug abeautifulmess.com

Supplies:
-3 king-size flat cotton bedsheets

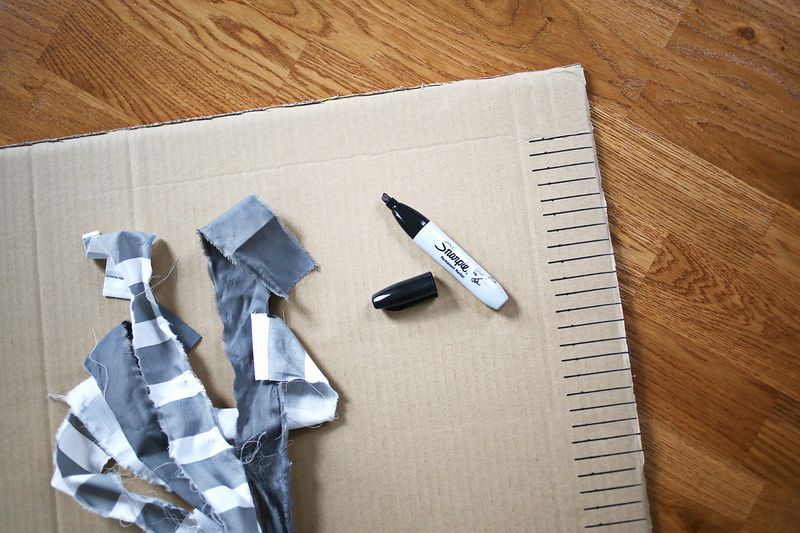
-piece of cardboard (23″ x 43″)
–fabric scissors
–masking tape
-marker
–clear ruler
Make Your Own Woven Rag Rug abeautifulmess.com

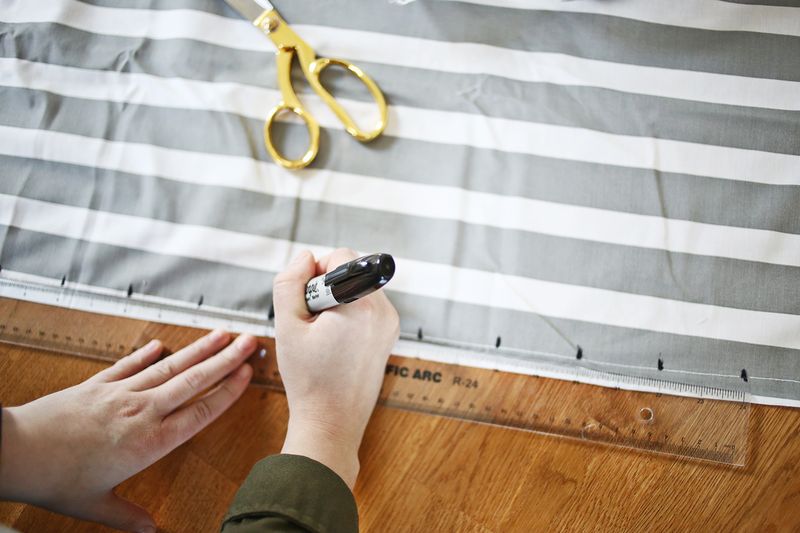
Step One: Use your ruler and marker to make a mark every 2″ across the longest side of each of your bedsheets. Use fabric scissors to make a 2″ cut at each mark.

Make Your Own Woven Rag Rug abeautifulmess.com

Make Your Own Woven Rag Rug abeautifulmess.com Step Two: At each cut, rip the fabric apart (it should tear evenly all the way across the sheet). Repeat this process until each sheet is ripped into even strips. Separate strips by color and pattern.

Make Your Own Woven Rag Rug abeautifulmess.com

Step Three: On each of the short ends of your cardboard, start 2″ from each end and mark 2″ long lines every 1/2″. Use scissors to cut 2″ slots at each mark. 

Make Your Own Woven Rag Rug abeautifulmess.com

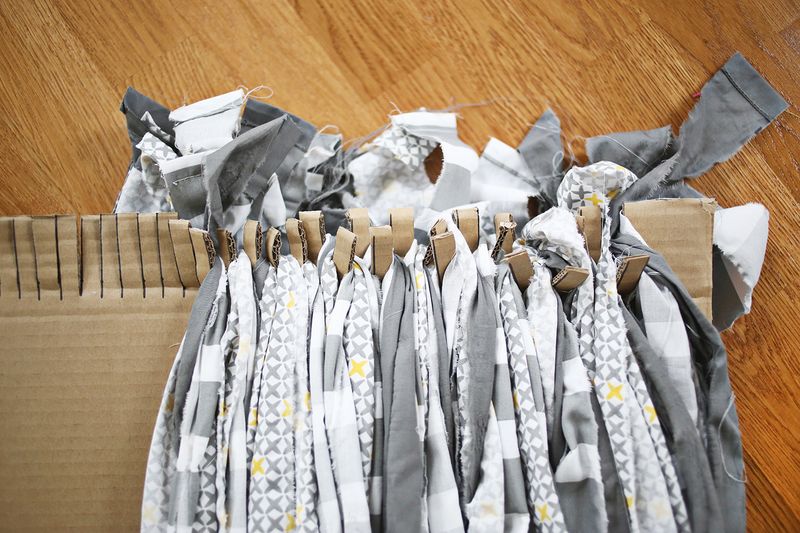
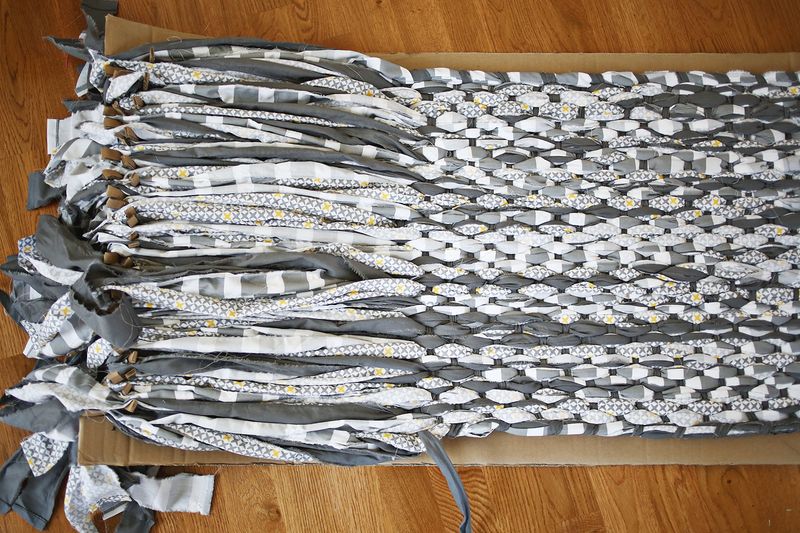
Step Four: Gather three fabric strips of various colors into a group, fold the group in half lengthwise, and place one end into the first slot (it should hang over the edge a few inches).

Place the other end into the corresponding spot on the opposite side. If you have a lot of strings hanging off the sides of your strips, try and pull the big clumps of strings off before you place into the cardboard slots.

Repeat this process for each strip across the cardboard. It will get pretty full after you have a few groups placed, but just keep going until you are done.

Make Your Own Woven Rag Rug abeautifulmess.com

Make Your Own Woven Rag Rug abeautifulmess.com Step Five: Designate one color as your weaving strip, and wrap a piece of masking tape around one end to make it easier to weave through the strips.

Starting about 2″ in from the end of your cardboard slots, begin to weave the weaving strip under and over each group until you get to the other side.

Make sure to leave a 6″ tail at your beginning spot (you’ll lengthen this at the end). Because the cardboard is so full, the first row of weaving will be the hardest since it’s difficult to tell one group from another.

Just do the best you can—if you get a few strips into the wrong bunch, it won’t make a difference at the end.

Once you get to the other end with your weaving strip, make a U-turn by going over or under the last bunch (whichever is needed depending on where you end up), and weave your way back to the other side (it should be much easier this time).

As you finish each row, straighten out the weaved strip with your fingers and slide it as close to the row before it as you can.

Repeat the weaving process until you’re about 2″ from the cardboard slots on the other end of the rug. Make sure to pay attention to the width of your rug as you go, and keep it as even as you can.

This type of weaving gives you a lot of control over your width since you can simply tighten or loosen your strip as you make the turn at each end.

When you get to the end of your weaving strip, you’ll want to join a new strip to the existing one so you can keep on weaving.

Cut a slot into the end of your weaving strip and the beginning of your new strip, and pull an inch or two of your new strip through the slot on the existing strip.

Pass the tail end of your new strip through the slot on the new strip and pull tight. Now you have a longer strip! Keep doing that each time you need to extend your weaving strip.
Make Your Own Woven Rag Rug abeautifulmess.com

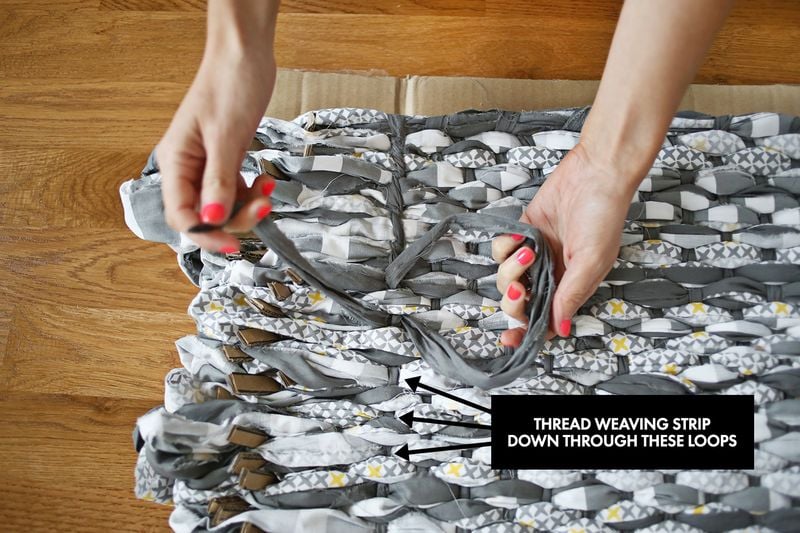
Step Six: To finish the ends, make a U-turn around the last bunch where your weaving ended, and thread your weaving strip down through the first exposed section of your last row of weaving (see above photo).

Pull tight. Again, cross over to the next exposed weaving and thread down through that section and pull tight. Continue until you reach the end, and tie your weaving strip onto one of the strips in the last group of strips.

Repeat process on the opposite end (you’ll have to join a strip to lengthen the tail of your beginning weaving strip first).

Make Your Own Woven Rag Rug abeautifulmess.com

Step Seven: You’re almost done! Just place a ruler or a piece of cardboard inside of where you want to trim your ends and use fabric scissors to trim the excess pieces. Once the ends are cut, you can remove the cardboard backing.

You did it! You just made a rug!

Make Your Own Woven Rag Rug abeautifulmess.com

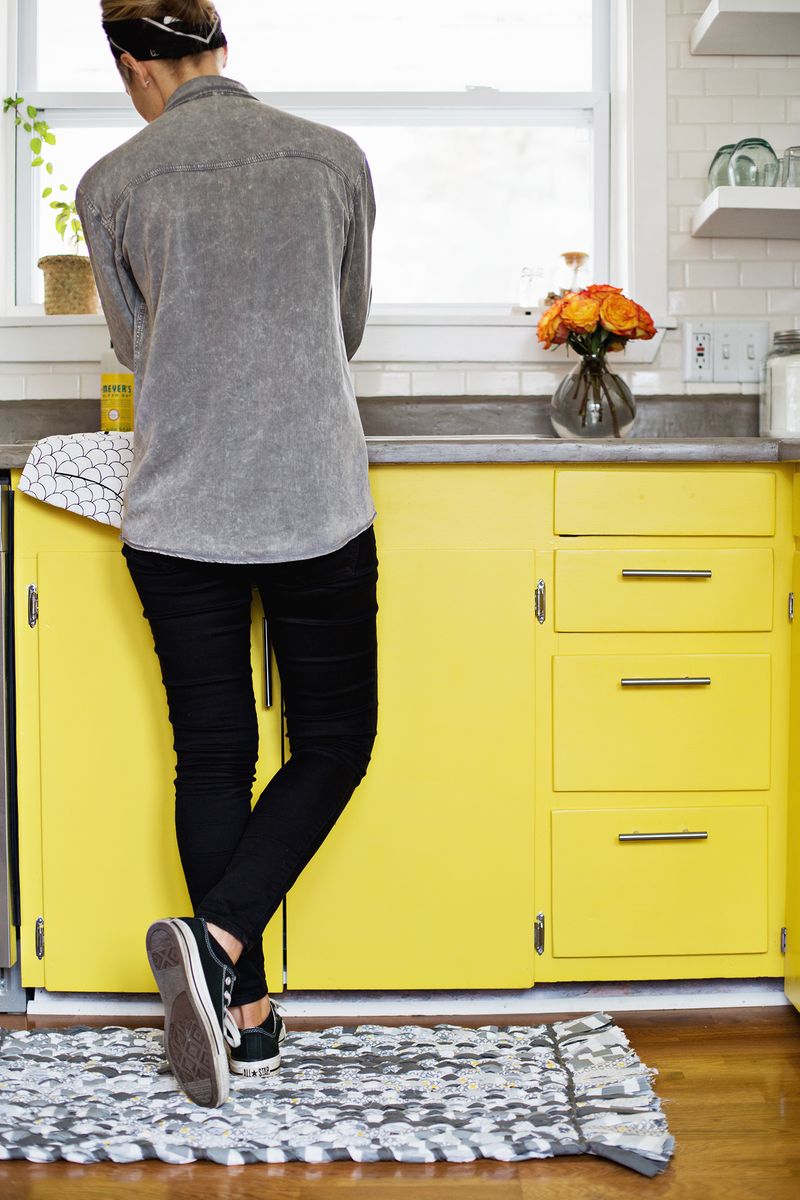
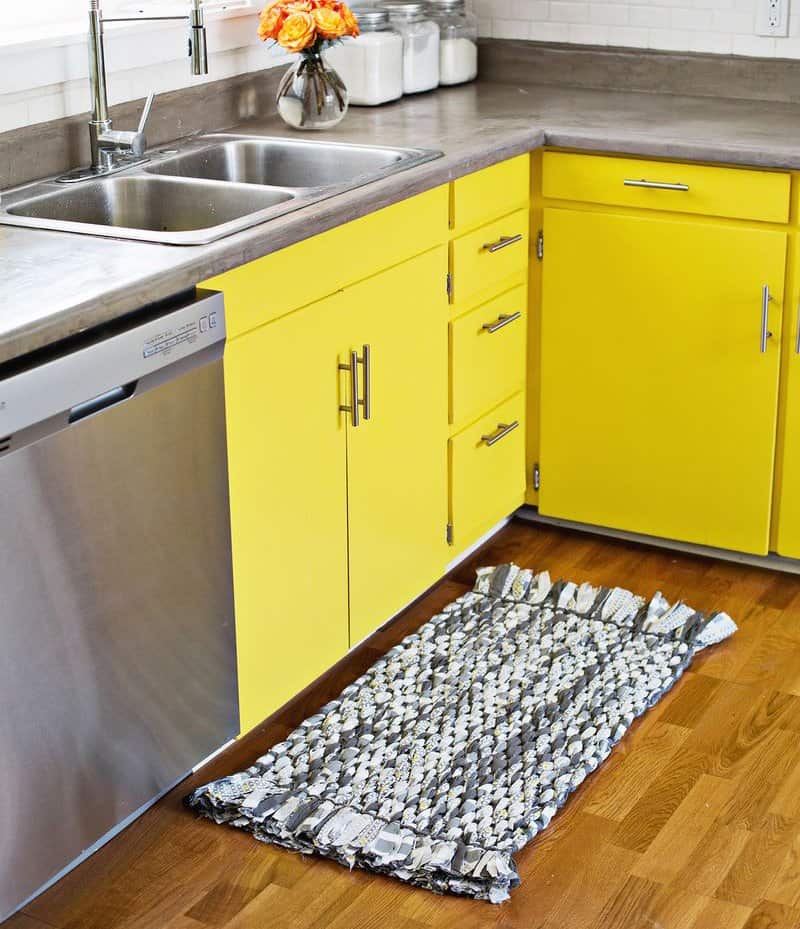
Make Your Own Woven Rag Rug abeautifulmess.com Make Your Own Woven Rag Rug abeautifulmess.com I’m pretty proud of my first attempt at rug making. I think it’s just what our space needed (the color looks so nice with the DIY concrete countertop).

If you prefer to buy a handmade rug, check out Elsie’s favorite rugs on Etsy (or our favorite rugs under $250). xo, Laura

Looking for more DIY rug tutorials?

Woven Rag Rug

How to make a woven rag rug from torn fabric pieces.

  • 3
    king-size
    flat sheets
    cotton
  1. Use your ruler and marker to make a mark every 2″ across the longest side of each of your bedsheets. Use fabric scissors to make a 2″ cut at each mark.

  2. At each cut, rip the fabric apart, and it should tear evenly all the way across the sheet. Repeat process until each sheet is ripped into even strips. Separate strips by color and pattern.

  3. On each of the short ends of your cardboard, start 2″ from each end and mark 2″ long lines every 1/2″. Use scissors to cut 2″ slots at each mark. 

  4. Gather three fabric strips of various colors into a group, fold the group in half lengthwise, and place one end into the first slot (it should hang over the edge a few inches).

    Place the other end into the corresponding spot on the opposite side. If you have a lot of strings hanging off the sides of your strips, try and pull the big clumps of strings off before you place into the cardboard slots. Repeat this process for each strip across the cardboard. It will get pretty full after you have a few groups placed, but just keep going until you are done.

  5. Designate one color as your weaving strip, and wrap a piece of masking tape around one end to make it easier to weave through the strips. Starting about 2″ in from the end of your cardboard slots, begin to weave the weaving strip under and over each group until you get to the other side.

    Make sure to leave a 6″ tail at your beginning spot (you’ll lengthen this at the end). Because the cardboard is so full, the first row of weaving will be the hardest since it’s difficult to tell one group from another. Just do the best you can, and if you get a few strips into the wrong bunch, it won’t make a difference at the end.

  6. Once you get to the other end with your weaving strip, make a U-turn by going over or under the last bunch (whichever is needed depending on where you end up), and weave your way back to the other side (it should be much easier this time). As you finish each row, straighten out the weaved strip with your fingers and slide it as close to the row before it as you can.

    Repeat the weaving process until you are about 2″ from the cardboard slots on the other end of the rug. Make sure to pay attention to the width of your rug as you go, and keep it as even as you can. This type of weaving gives you a lot of control over your width since you can simply tighten or loosen your strip as you make the turn at each end.

  7. When you get to the end of your weaving strip, you’ll want to join a new strip to the existing one so you can keep on weaving. Cut a slot into the end of your weaving strip and the beginning of your new strip.

    Pull an inch or two of your new strip through the slot on the existing strip. Pass the tail end of your new strip through the slot on the new strip, and pull tight. Now you have a longer strip! Keep doing that each time you need to extend your weaving strip.

  8. To finish the ends, make a U-turn around the last bunch where your weaving ended, and thread your weaving strip down through the first exposed section of your last row of weaving (see above photo). Pull tight. Again, cross over to the next exposed weaving and thread down through that section and pull tight.

    Continue until you reach the end, and tie your weaving strip onto one of the strips in the last group of strips. Repeat process on the opposite end (you’ll have to join a strip to lengthen the tail of your beginning weaving strip first).

  9. Place a ruler or a piece of cardboard inside of where you want to trim your ends and use fabric scissors to trim the excess pieces. Once the ends are cut, you can remove the cardboard backing.




Previous Post

Highlights Ryder Cup 2021 – Dustin Johnson

Next Post

Sausage Stuffed Mushrooms in the Air Fryer

golfinger007

Next Post
Sausage Stuffed Mushrooms in the Air Fryer

Sausage Stuffed Mushrooms in the Air Fryer

Search

No Result
View All Result

Newsletter

RECENT NEWS

How to Take an Amazing Mountain Shot – On the Trail of Ansel Adams
Photography

How to Take an Amazing Mountain Shot – On the Trail of Ansel Adams

by golfinger007
17th November 2026
0

Download the files to follow along this tutorial : https://www.photoserge.com/offers/7LcpjvoP In this episode, I will show you how ... source

Read more
Solo Acoustic Instrumental Original – Jamie Dupuis

Solo Acoustic Instrumental Original – Jamie Dupuis

17th November 2026
Charcuterie Dip

Charcuterie Dip

17th November 2026
Wondermind Lawsuit Accusing Selena Gomez of Fraud Is Dismissed

Wondermind Lawsuit Accusing Selena Gomez of Fraud Is Dismissed

17th November 2026
Alice Cooper | November 15, 2026 | Findlay Toyota Center | Prescott Valley, AZ – Concert Review & Photo Gallery

Alice Cooper | November 15, 2026 | Findlay Toyota Center | Prescott Valley, AZ – Concert Review & Photo Gallery

17th November 2026

POPULAR POSTS

  • I meet the Youngest Titanic Survivor Millvina Dean!

    I meet the Youngest Titanic Survivor Millvina Dean!

    0 shares
    Share 0 Tweet 0
  • Get back to the Beatles with Sir Alan Parsons

    0 shares
    Share 0 Tweet 0
  • 15 The Rock Movies You Slept on or Totally Forgot About

    0 shares
    Share 0 Tweet 0
  • AMAZING Texas Sheet Cake | The Recipe Critic

    0 shares
    Share 0 Tweet 0
  • Film Noir Review: Where Danger Lives (1950)

    0 shares
    Share 0 Tweet 0
Facebook Youtube Pinterest Instagram
Me Passions

About US
Welcome to our stimulating blog and journal!

Hello! Let me introduce my wife and myself. I am Stephane and I was really lucky to meet my wife, Mariolis, 14 years ago in the beautiful Caribbean island of Cuba. For some time now we have dreamed to create an on-line ‘dairy’ and blog to share aspire our life’s passions
Read my full story.

Categories

  • Art
  • Beauty
  • Blues Music
  • Cigar Box Guitar
  • Cinema
  • Collectibles
  • Cuba
  • Discography
  • Folk music
  • Food
  • Graphic Design
  • Guitar luthier tool
  • History
  • Jewelry
  • Lifestyle
  • Magazine
  • Meet and Greet
  • MePassions news
  • Movie
  • Music
  • Paul McCartney
  • Photography
  • Photoshop
  • Recipes
  • Rolling Stones
  • Television
  • The Beatles
  • Travel
  • Uncategorised
  • Vintage guitar

Tags

Art Blues Collectible Cuba Film Font Food Food recipe Graphic Design Graphic Design Photography Photoshop Guitar Harp guitar Historical History Lifestyle Magazine Movie Music Photography Photoshop Recipe Food Recipes Serge Ramelli Television The Beatles Time Titanic Tommy Emmanuel Travel Vintage guitar

MePassions.com is a participant in the Amazon Services LLC Associates Program, an affiliate advertising program designed to provide a means for sites to earn advertising fees by advertising and linking to Amazon.com. MePasions.com is participant of other affiliate programs Disclaimer© 2021 MePassions - All rights reserved MePassions.

No Result
View All Result
  • Home
  • About US
    • Privacy and Copyright 2020
    • Disclaimer
  • Categories
    • Travel
    • Collectibles
    • Recipes
    • Meet and Greet
    • Music
    • Photoshop
    • Photography
    • Jewelry
    • Movie
  • Women
    • Women handbags
  • Men
    • Watches
    • T-shirts
  • Jewelry Sterling Silver
  • Learn Guitar Online
  • Acoustic Guitars
    • Aiersi Resonator Guitar
    • Resonator
    • Custom Electric Guitars
    • Guitar Amplifiers
    • Guitar Builder/Luthier Supply
  • Books
    • Food book
    • Movies & TV Shows
  • Music
    • Albums
    • Beatles vinyl
      • Beatles Memorabilia
    • Turntable Record Player
  • Shop
    • Basket
    • Checkout

MePassions.com is a participant in the Amazon Services LLC Associates Program, an affiliate advertising program designed to provide a means for sites to earn advertising fees by advertising and linking to Amazon.com. MePasions.com is participant of other affiliate programs Disclaimer© 2021 MePassions - All rights reserved MePassions.

Welcome Back!

Login to your account below

Forgotten Password?

Create New Account!

Fill the forms below to register

All fields are required. Log In

Retrieve your password

Please enter your username or email address to reset your password.

Log In
en English
ar العربيةnl Nederlandsen Englishfr Françaisde Deutschit Italianoja 日本語ko 한국어ru Русскийes Españolsv Svenskatr Türkçeur اردوvi Tiếng Việt

Add New Playlist